Learn how you can easily sync GoodNotes between your iPad and Mac devices in this simple guide.
Document synchronization for GoodNotes requires iCloud.When your device is connected to the internet and you make changes, they will sync to all of the other devices that are signed into the same Apple ID.
To set up GoodNotes for iCloud sync, follow these steps:
- Use your current Apple ID to register first.
- Open the Apple ID > iCloud section of the iOS Settings app and make sure that “iCloud Drive” and “GoodNotes” are both enabled.
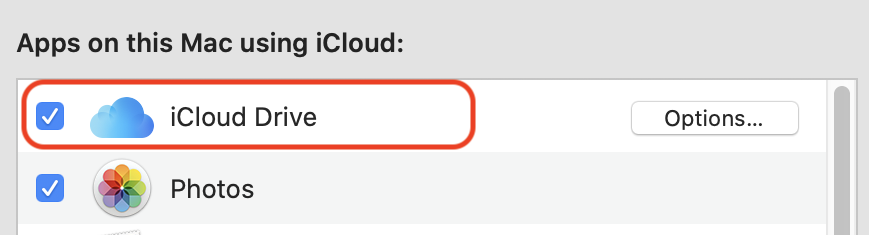
- Open System Preferences on your Mac, choose iCloud, then enable “iCloud Drive.”
- Click Options… next to “iCloud Drive” to enable “GoodNotes” in the list.
- Select the Gear icon after launching GoodNotes.
- In the Library view > Settings > iCloud Settings menu, select “Use iCloud” to enable.
Reminder: If you only wish to sync your GoodNotes papers from your single device to iCloud, just follow steps 2 and 4.
Why is GoodNotes not syncing with Mac App?
One of your devices may go out of sync if you use GoodNotes 5 on iPad or iMac. Options for syncing with the Mac app differ slightly from those for iOS. Sometimes you could realize that the Mac App is not syncing, and the procedures for turning the sync back on varies.
Please ensure that all of the prerequisites are completed in order to maintain your data and documents synchronized between devices.
- All of your devices are running the most recent version of GoodNotes (iPad, iPhone, Mac). For instance, iCloud sync won’t function if your iPhone and Mac versions of GoodNotes are either older or newer than each other. Opening the description page and clicking or tapping the “Update” button, if present, is the best way to confirm.

- Sometimes there are no pending updates visible in the App Store icon.
- With the same iCloud ID, you’re signed in to all of your devices (your Apple ID).
- All of your devices’ GoodNotes Settings > iCloud Settings have “Use iCloud” checked.
- Your Mac has both “GoodNotes” and “iCloud Drive” checked in the list that displays when you click Options… next to “iCloud Drive” in System Preferences > Apple ID’s “Apps on this Mac using iCloud” section.
5.You have adequate room on your iCloud Drive account.
If it still won’t sync, export the diagnostic information from GoodNotes on your Mac and submit it to their support staff using their contact form for more analysis: From the Documents tab, select the GoodNotes menu (Gear icon), then select About > Export Diagnostic Data. Your Mac may benefit from a restart as well.
How to properly sync and backup your GoodNotes using iCloud
We advise users to manually backup their critical notebooks via the GoodNotes App Menus in order to better secure them.
GoodNotes documents can be synced between iPhones, iPads, and Macs via iCloud sync, which can be set up. You may easily check the sync status on one of your devices by using the same Apple ID if your iPad is damaged, you lose access, or you are unsure whether the data has been synchronized or not.
How to Sync GoodNotes with iCloud:
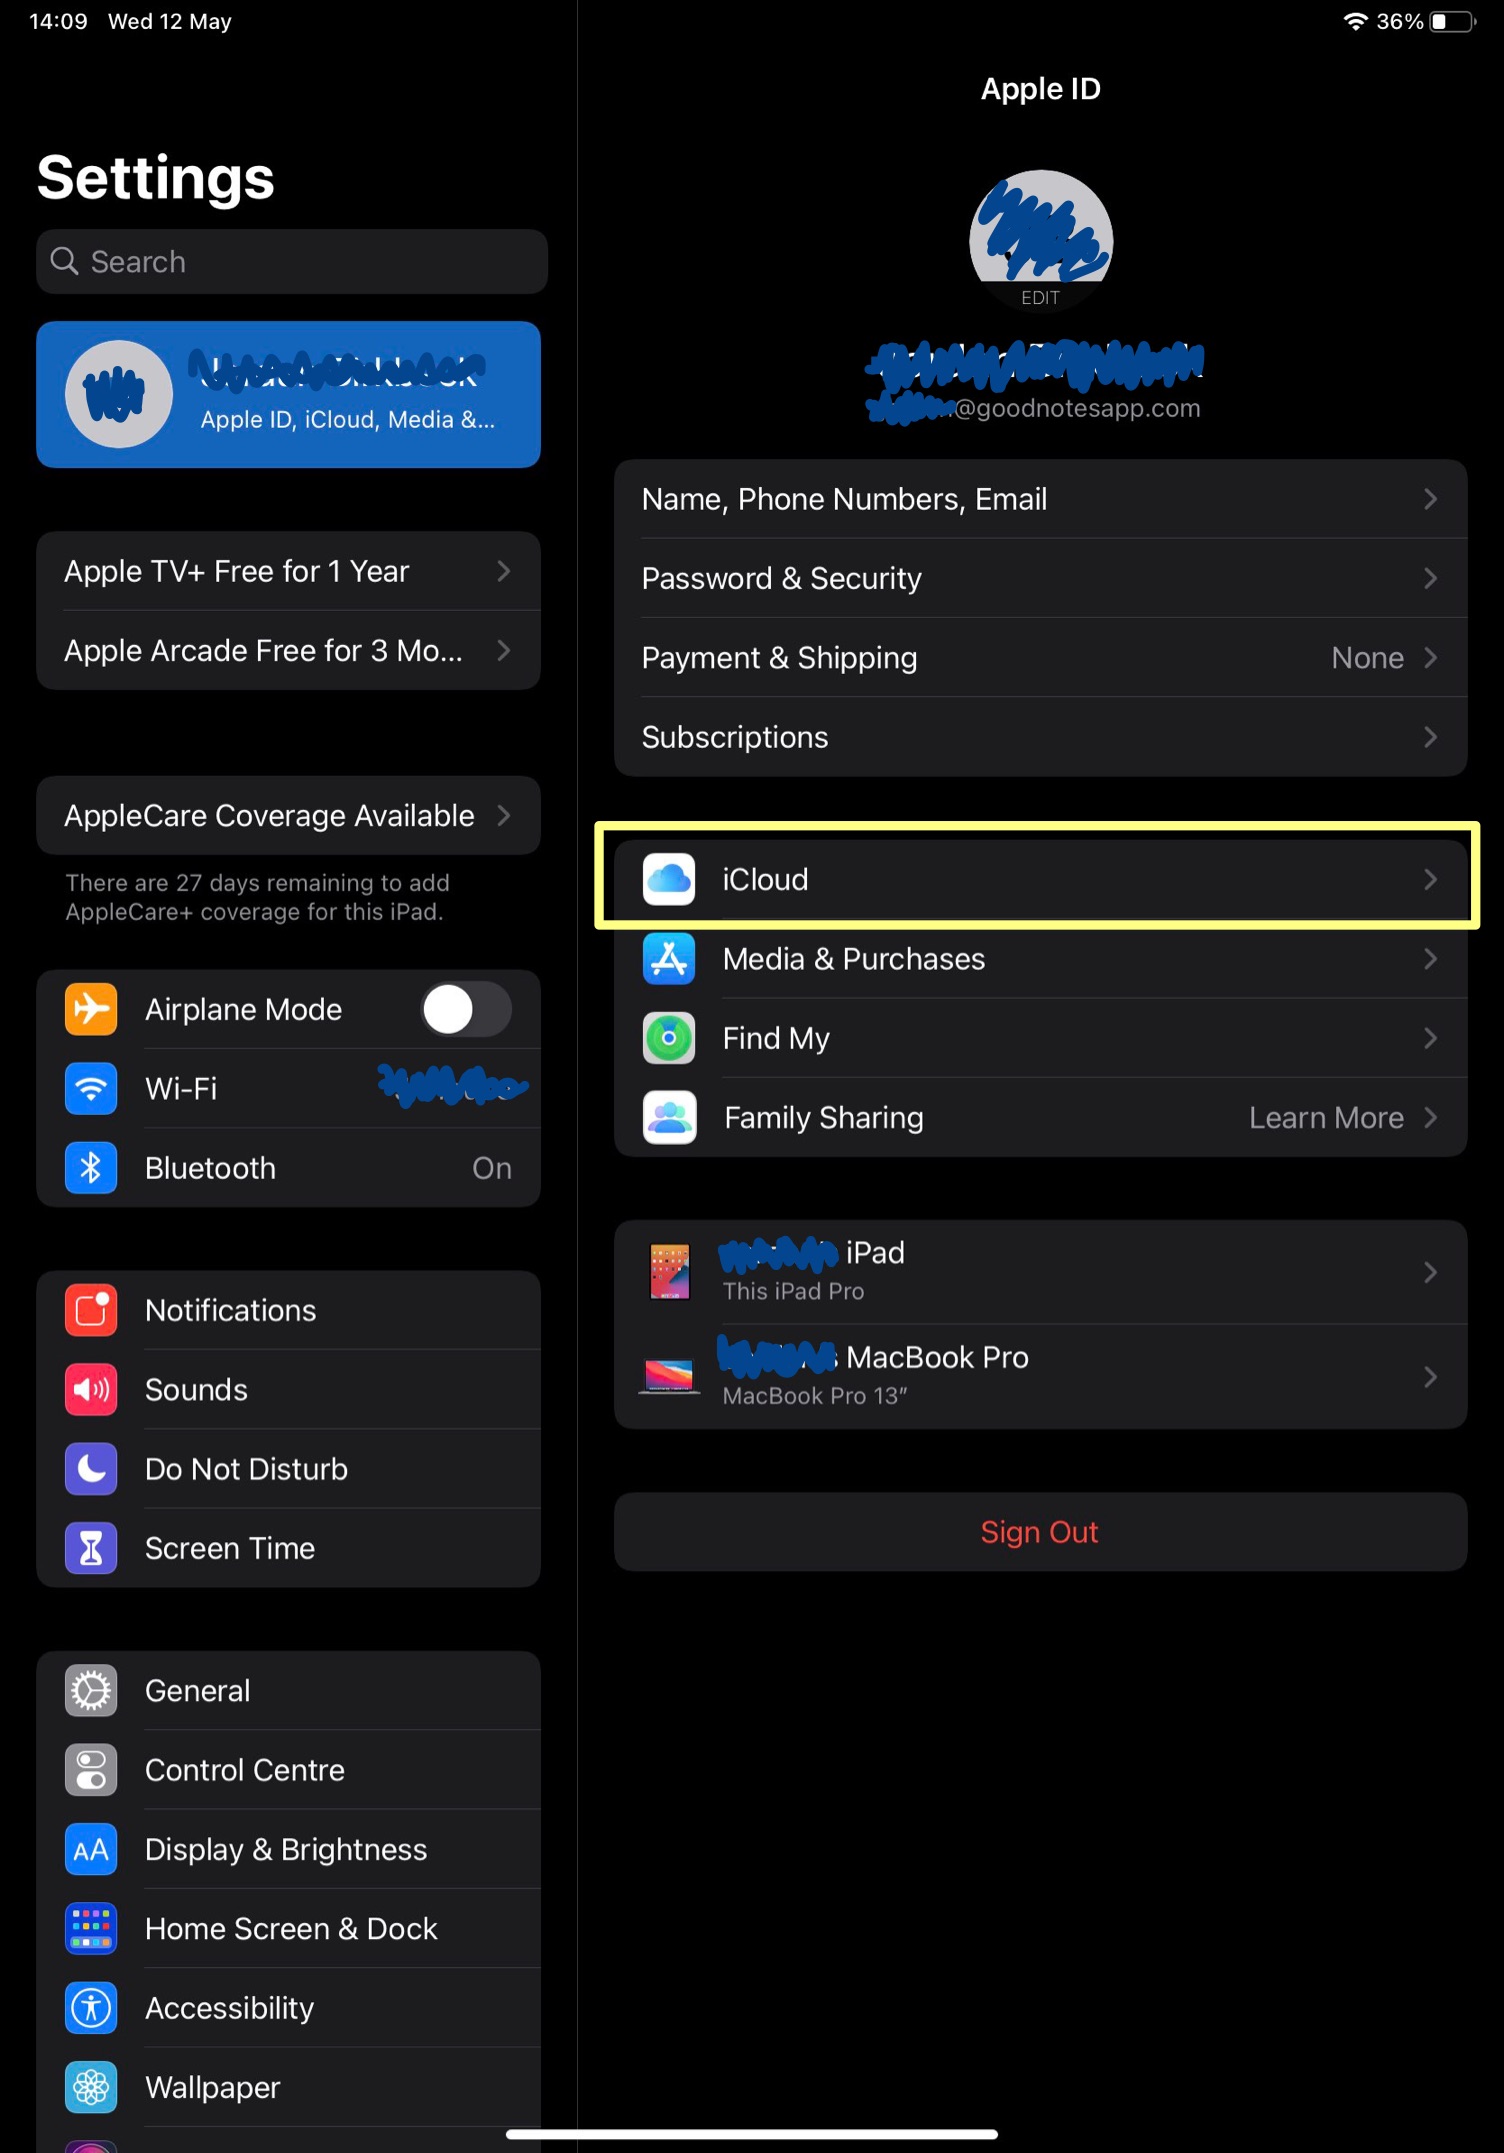
- Open the Settings app on your iPhone or iPad.
- Select your Apple ID (located in the top row of the Settings list).
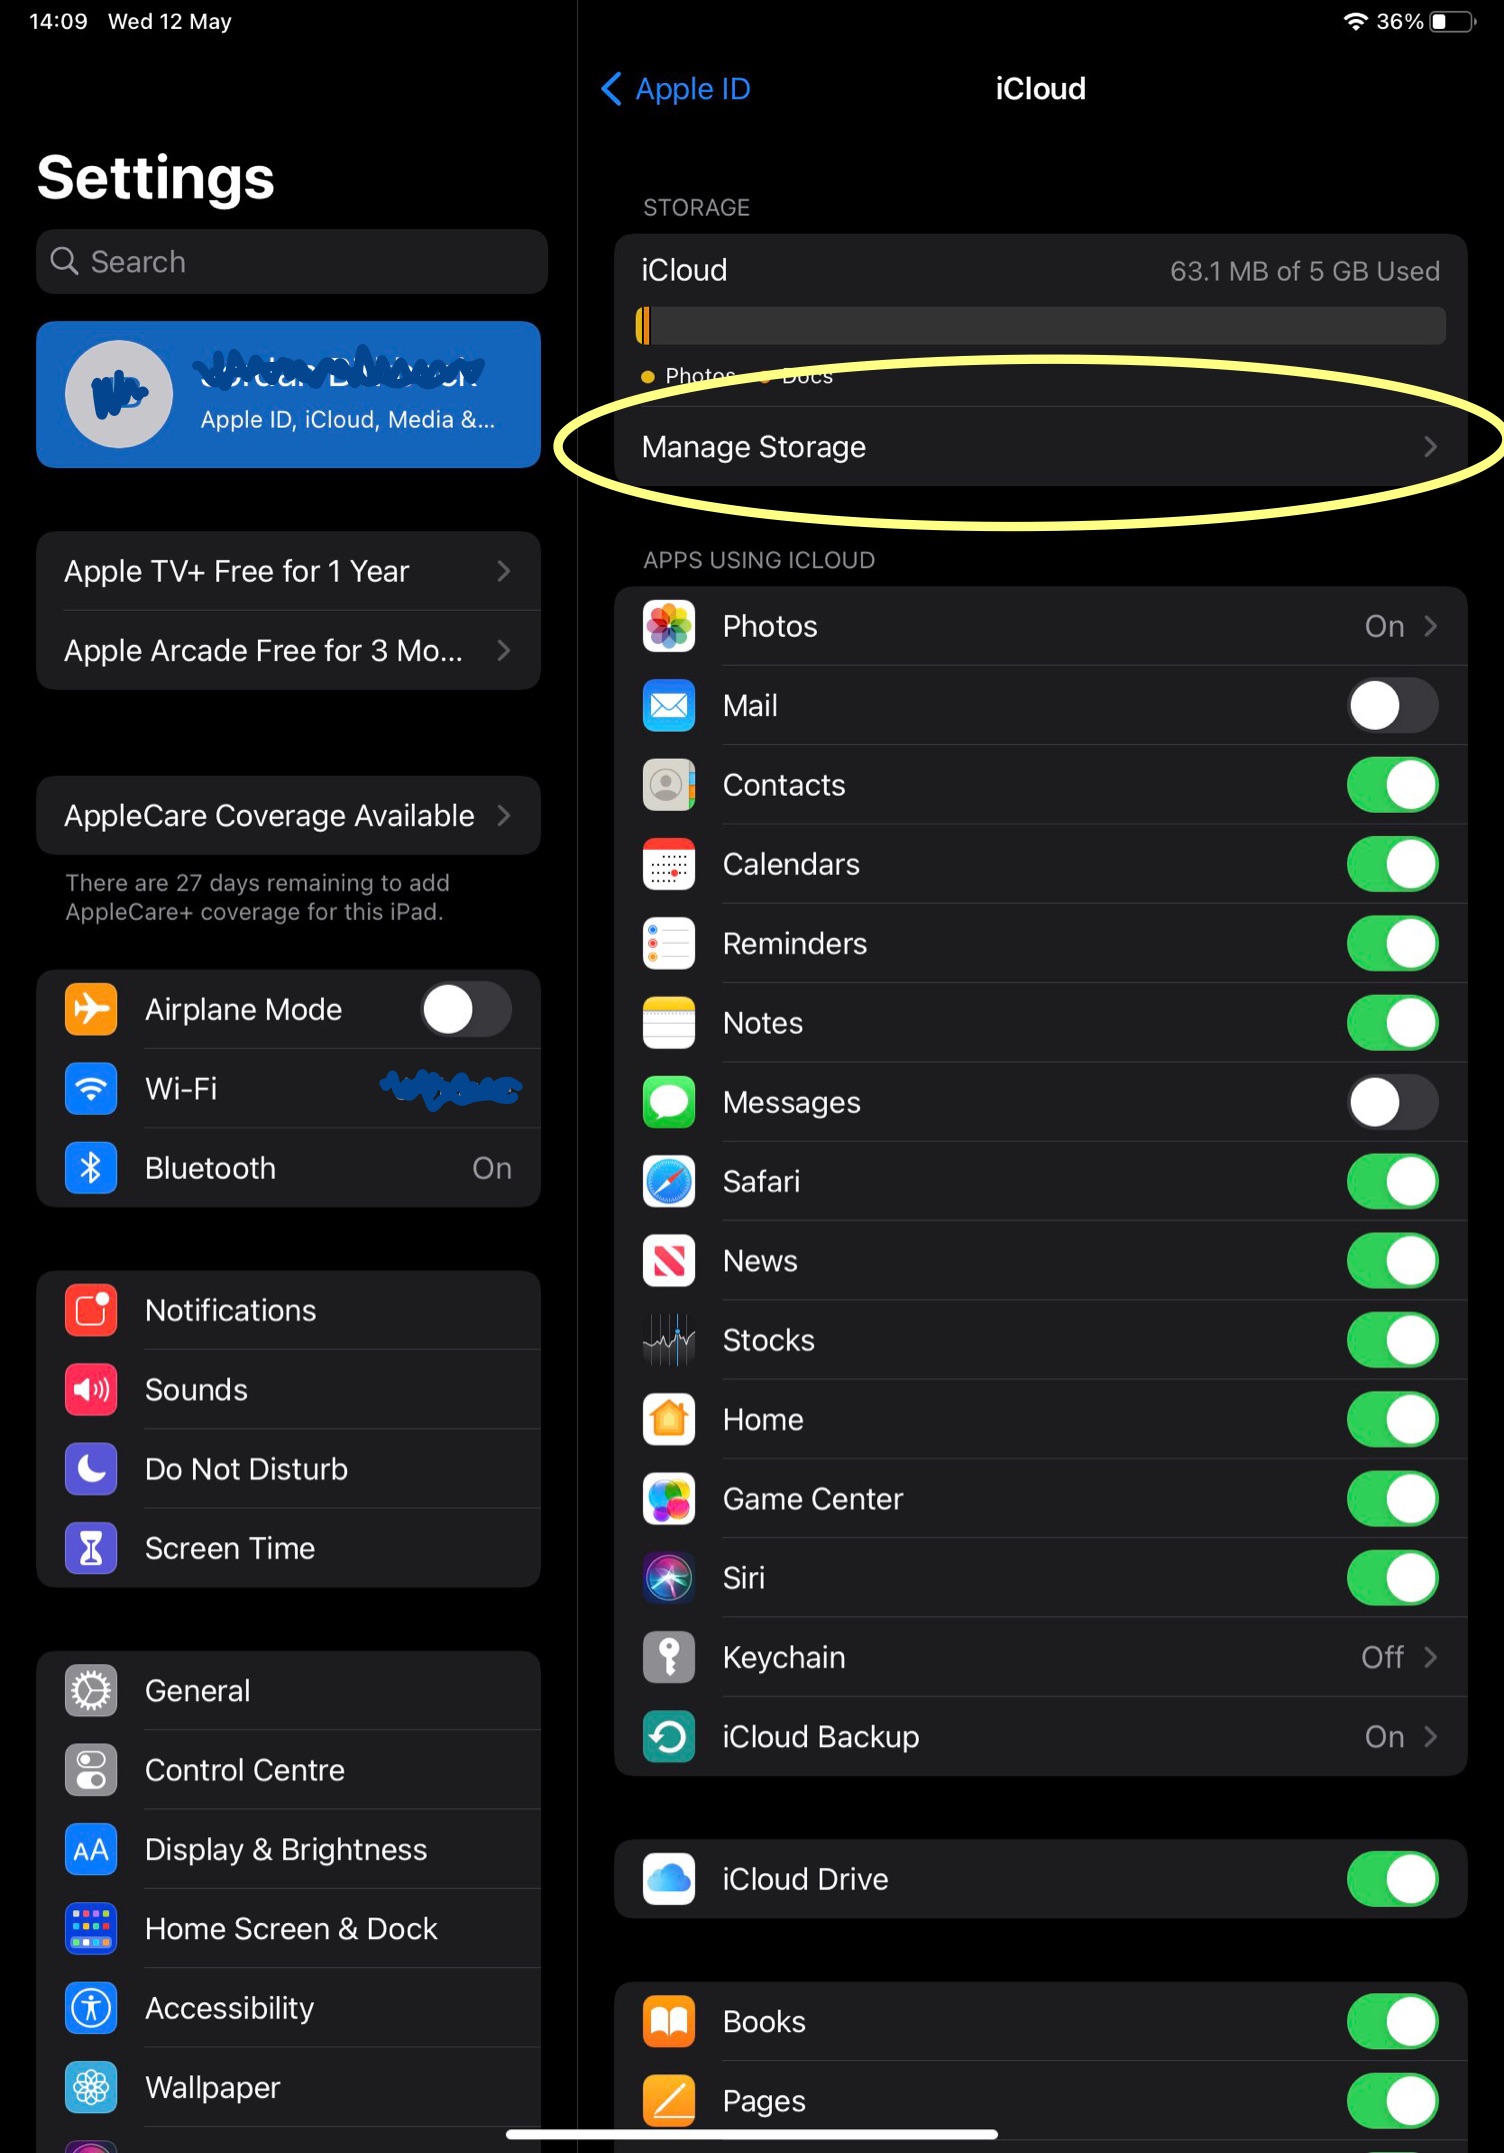
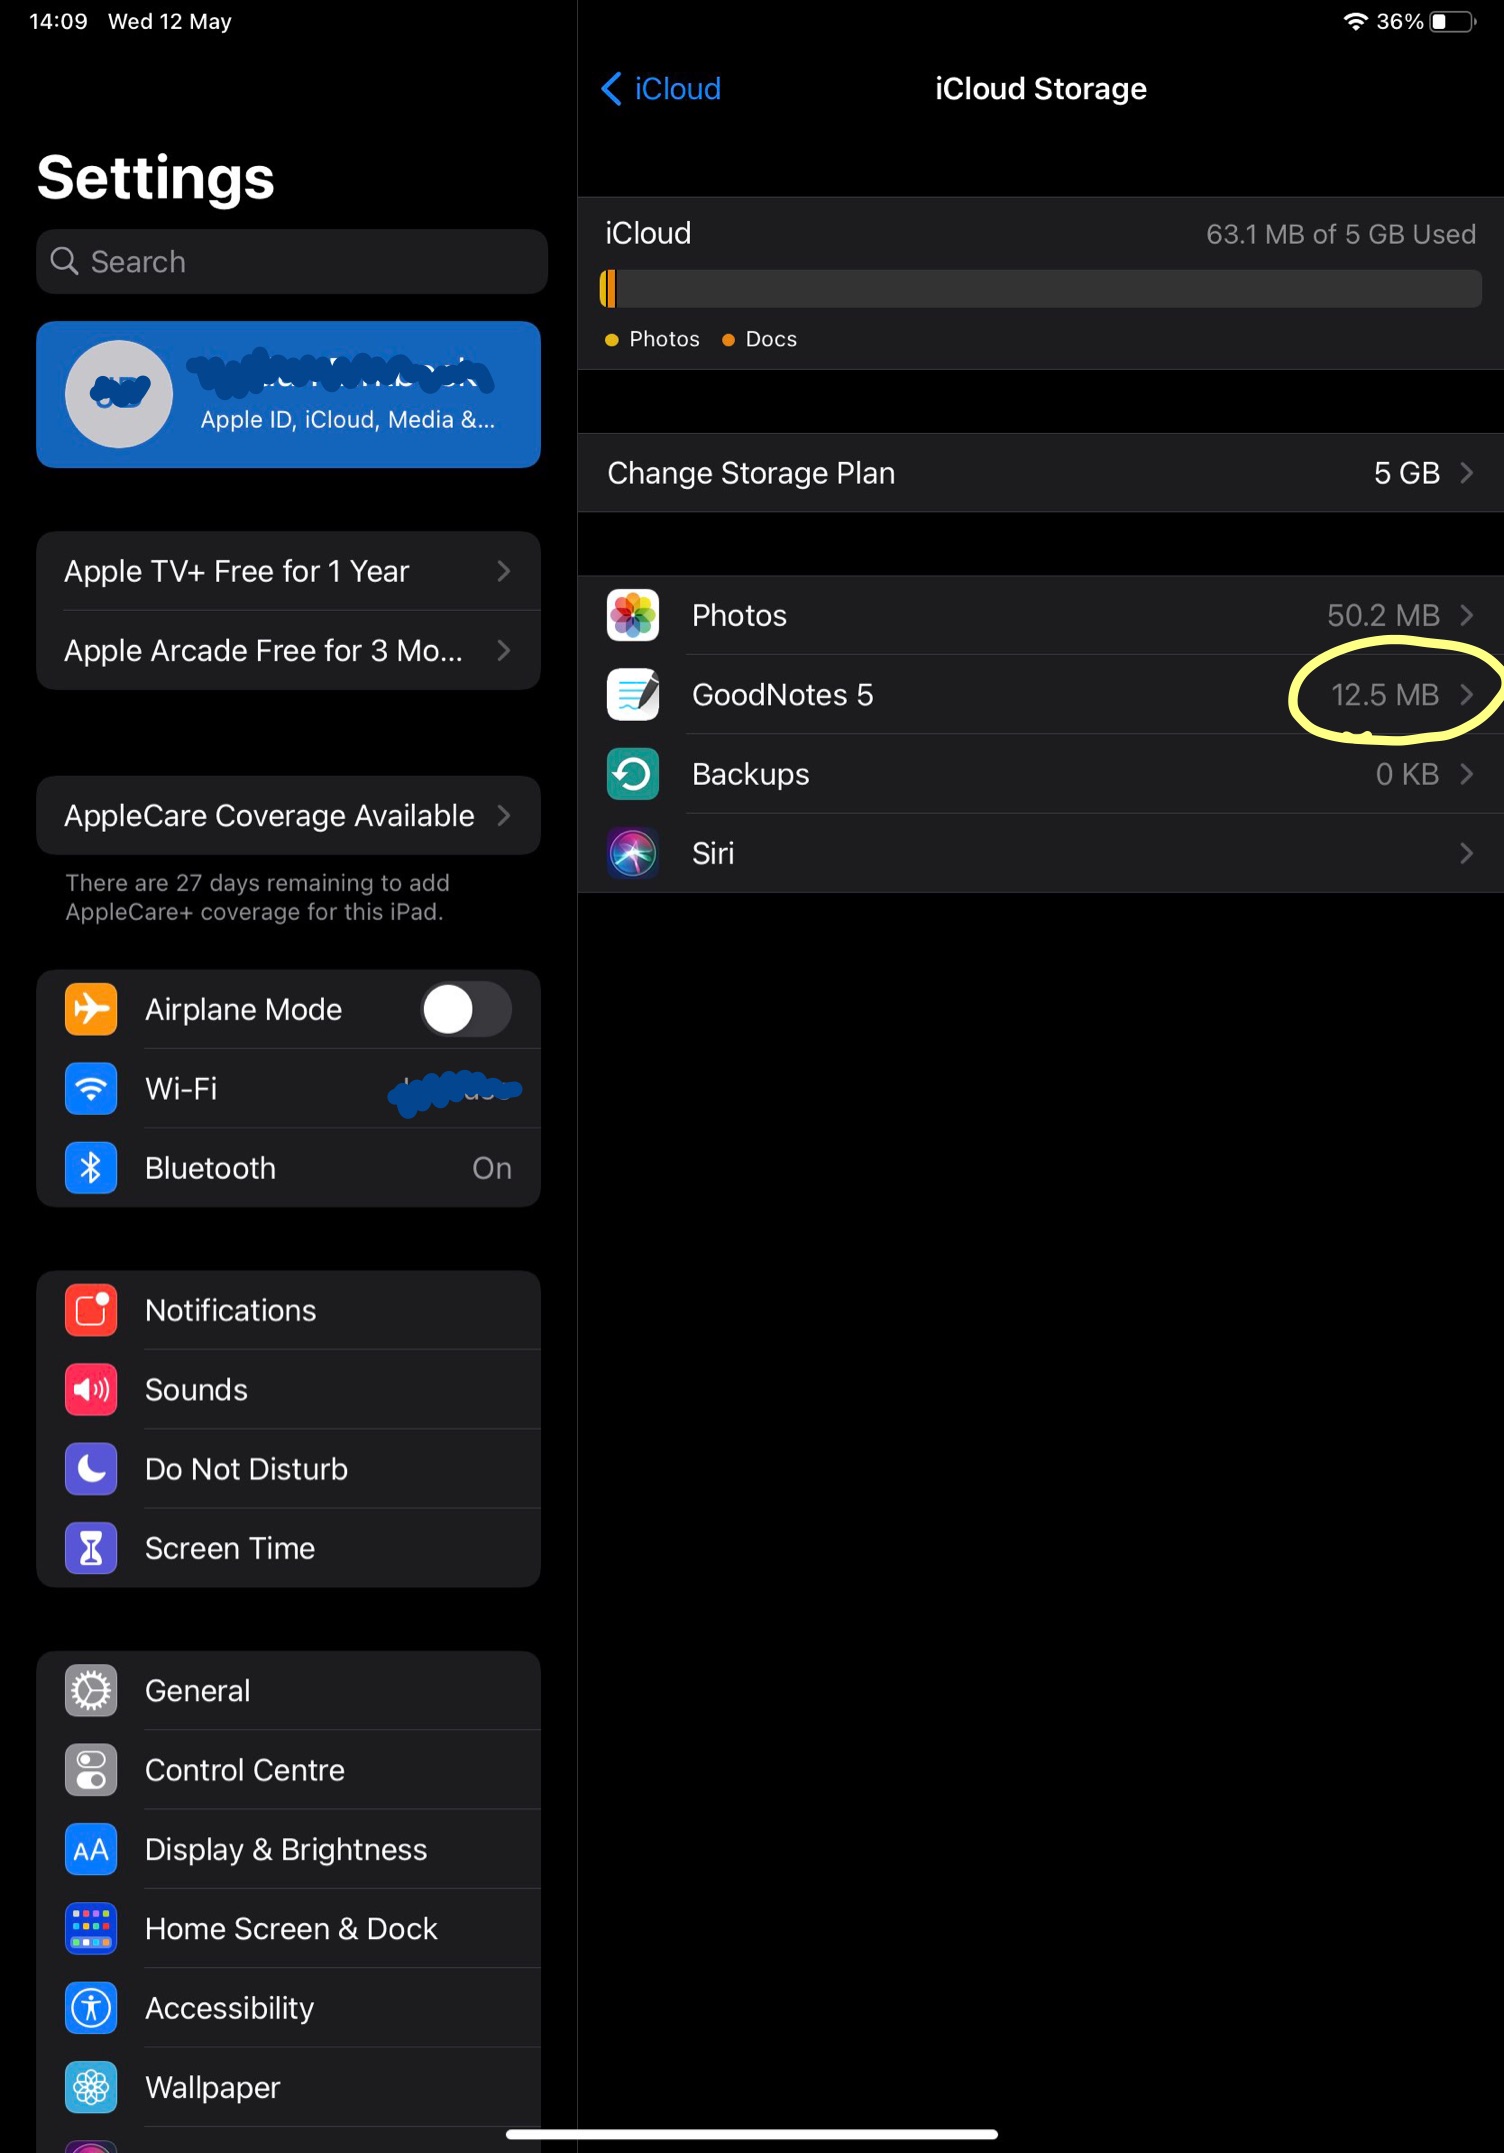
- Select iCloud > Manage Storage.
- Search for GoodNotes to see if your app data is kept there.
It is possible that the full app data has been backed up using the device backup even though the iCloud sync feature in GoodNotes was not activated. To check if this is the case, turn on iCloud’s Device Backup. Just check to see if it’s ON by going to Settings > Apple ID > iCloud > iCloud Backup on your iPad. After that, click “Manage Storage” > “iCloud Backups” > to see if your device is mentioned in the Backup area.
We hope that you now know how to easily sync GoodNotes data between iPad and Mac devices.